
Journal — Dirt
Rachel Clare
04th July 2020
How to: Prepare an area for planting
When preparing a new garden bed or area for planting there are a few simple steps you can take to ensure the soil is in the best condition to welcome your new plants. With the correct physical make up and ample nutrients, the garden will thrive.
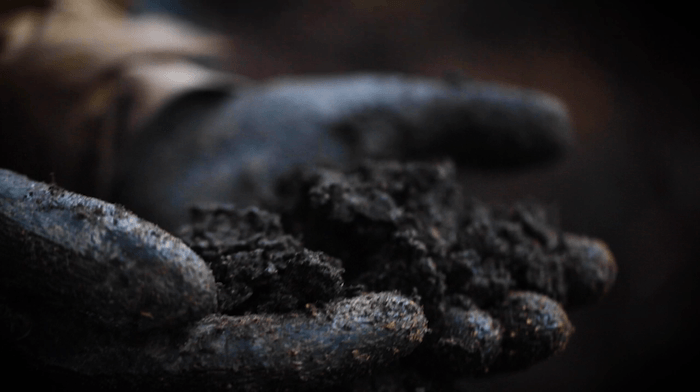
Healthy soil is the key to healthy plant growth, yet often we become so focused on the plants that nurturing our soil is not our main priority. Good soil is teeming with organisms that are busy transforming decaying organic matter into minerals and nutrients that feed your plants from the roots up. It should crumble in your hands but still be moist to the touch.
Step 1: Identify your soil - Clay, sand or fertile?
When preparing a new garden bed, it is important to first acquaint yourself with what kind of soil you have as this will determine how you approach the preparation for planting.
CLAY
Clay soils are made up of many fine particles, making them rich in nutrients. Unfortunately, it is hard for water to infiltrate through the particles during prolonged periods of wet weather and in winter your garden or lawn becomes a sticky, squelchy bog. Conversely, in summer, clay soil can turn rock hard. These conditions make it hard for many types of plants to put their roots down and they can become rootbound and die.
SAND
Sandy soils are the opposite of clay soil. Where clay soils retain water and become heavy, in sandy soils water drains away, making it hard for plants in these soils to take up moisture and nutrients.
FERTILE - Volcanic, silt & loam
Fertile soils are free draining, with soil particles that are between clay and sandy soils in size. Silt, volcanic and loam soils (loam is a mixture of the various soil types) are all fertile soils and you should count your blessings if you have it - and try not to show off too much to your gardening friends with clay or sandy soil!
If you’re not sure what kind of soil you have, you can find out by making a soil sausage. Scoop up a handful of soil into your hand, add a little water and shape it into a bendy sausage shape. If you are able to keep bending it until you form a circle, you have clay soil; if it totally disintegrates, your soil is sandy; and if you’re able to bend it into a sausage but it doesn’t form a circle, you have a fertile soil.

Step 2 - Surface prep
If you’re not in a hurry to get planting and can wait a month or so, an easy way to remove any weeds or grass is to cover them with cardboard or carpet (make sure it has no plastic binding it together as it will never break down) until the plants below have died back and you can remove the cover layer, reading for soil prep. If you’re looking to turn lawn into garden quickly cut the turf out with a spade square by square, removing all the grass roots and sods.

Step 3 - Add nutrients
Once the weeds or grass have died back or been removed, turn the soil over gently with a fork to aerate it, then start to work in organic matter. Add layers of compost, sheep pellets or, even better, sheep dags if you can get them. Utilise what’s readily available in your garden or neighbourhood as well. Leaf litter, from falling leaves are a rich source of carbon, which can be piled onto your soil. If your soil is clay, add gypsum (calcium sulphate) or clay breaker. If you have a sandy soil, you can improve it by adding 20-40 per cent clay to it.
Alternative: Sheet mulching, the no dig method
If you don’t want to dig, you can also build your garden bed up on top of the existing soil using the “no dig” method. This way you won’t have to dig into the soil and you leave the microorganism below undisturbed (Note: not recommended for clay soils as the soil beneath needs to be loosened so plants can send their roots down). First, layer on piles of cardboard or 10 sheets of newspaper, wet it thoroughly, then add a layer of compost and then a thick layer of grass clippings, straw or hay. Let it sit for a season (3-4 months) until it rots down, then plant into it directly. This method also works well for raised beds – the bottom two-thirds of the bed can be layers of prunings, twigs, straw, newspaper, cardboard, manure and grass clippings, then you only need to add garden mix to the top third.

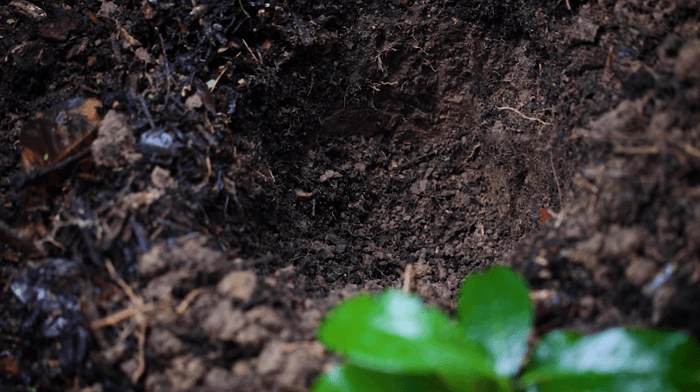
Step 4 - Topsoil and garden mix
If you’re making a garden on a site where there has been construction or if you have removed the top layer of the grass sods, it's likely the subsoil below will have been exposed. Subsoil is not suitable for planting into, and you’ll need to purchase some topsoil. Topsoil is usually loam but there are different types of loam – clay, silt or sand – so choose the one that will suit your garden’s needs best. Add a layer of gypsum to bind the introduced soil to the harder subsoil below.
The amount of topsoil required depends on how much soil has been removed, and how much organic matter you have added back into the garden at Step 3. If you need to fill a greater depth, garden mix is preferable over a large quantity of topsoil as it will add nutrients to the garden. Garden mix is a combination of topsoil and compost and it should always be your main planting medium rather than exclusively compost. While compost is a fantastic soil conditioner and can also be used as a mulch, it isn’t suitable for growing plants in on its own as it’s very rich and can burn plant roots. Various types of garden mixes are available, ie some are made specifically for growing vegetables in, so do your research first as to which kind of mix will be best for your soil and the types of plants you want to grow.
Optional extra: Add nitrogen by planting a green crop
If you want to really improve your soil health and give your plants the best start, grow a cover crop first. Legumes, such as peas, beans, lupins and clover are magnificent nitrogen fixers thanks to bacteria that lives in their root nodules. Nitrogen is vital to plant health because it gives plants their green colour and helps create food for the plant through photosynthesis. Once the crop has grown, chop them up and drop them back into the soil where they can provide nitrogen for other plants. Be sure to cut back before flowering to avoid spreading seed.


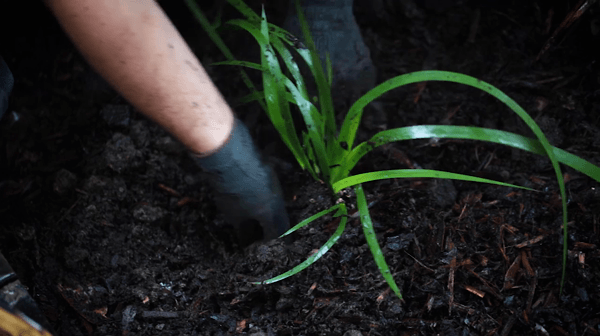
Step 7: Planting
Click here to read our journal on How to plant a plant.
Step 8: Mulch
Finally, it’s important to add a layer of mulch to your soil. Mulch comes from a Middle English word “molsh”, meaning soft and moist, and just as soil isn’t bare in nature - think of forest floors or tussock-covered swamplands - your soil shouldn’t be left to dry out or wash away either.
Mulch is a protective organic cover that insulates the soil below, locking in moisture in hot weather, suppressing weeds, providing decaying matter for microorganisms, adding nutrients to your soil and even improving its structure, too. It is important to never mulch right up to the plant's stem or trunk, as this can cause the plant to rot. Make sure you water deeply before adding your layer of mulch to avoid insulating in dryness.

You can use nearly anything as mulch. Thick bark-based mulches can be used around woody plants and thinner bark-based mulchers are suitable around perennials. If you are after a natural looking organic mulch that will contribute to the health of the soil, we recommend Dalton's Mega Mulch, a forest floor mulch that can be ordered and delivered by the cubic metre, avoiding wasteful plastic bags.

Other alternative options include pea straw which is a great mulch for vege gardens. You can also create your own mulch by using a thin layer of nitrogen-rich grass clippings (only use a couple of centimetres else they’ll go smelly), seaweed and pine needles. Pull weeds out by the roots, leave them to wilt for a day and then layer them on as mulch (this excludes bulbous weeds like oxalis unless you cut the bulb off). As an alternative or accompaniment to mulching, groundcovers are a great living mulch, covering up exposed soil.
Words by Rachel Clare
Illustration by James Walkinshaw

Join Our Newsletter
XANTHE WHITE DESIGN
Auckland Studio
Phone: 09 815 1187
Email: info@xwd.co.nz
XANTHE WHITE DESIGN
Wellington Studio
Email: wellington@xwd.co.nz